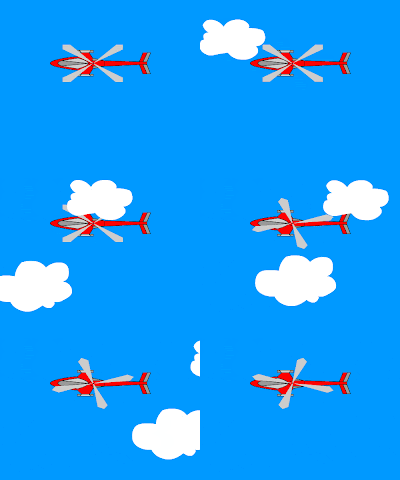

On Sunday, not the holiday, continued to go to school as usual, because today indeed was the flag ceremony commemorated our RI independence day was beloved the 63. The ceremony took place short, almost 40 minutes and all of them smooth, meaning that not there are those that must be repeated because of being wrong (understood, 1 year of only ceremonies 1 time). However, all the school components (the teacher, the employee and the student) continued to be enthusiastic to join the ceremony, despite the intensity of the sun stang. The proof is, many students who wore the uniform in an orderly manner, not “awut-awutan” and that must find it easy diatur.Pulang from the school, ate for a moment (really Padang), continued to carry out the activity as usual (ngeblog). In posting this I will give the tutorial flash, that is steps in the production animasi background moving (background moving). This tutorial sebenarn okay then was prepared by me since last night, while making his tutorial video. However, because file his video was too big (200 an MB), then I still not mentautkan in posting this time. If in download could up until how many hours ok? Dipikir-thought came back, finally was severed by me to immediately made his tutorial in blog and this tutorial not I for file pdf him. You could see results animai to the picture above. Want to read his tutorial? Animasi this usually was used to make background in game-game like game flash, that background him moved repeatedly. If you still the beginner, please read the basic tutorial animasi flash and his tutorial video. Along with steps in the production animasinya:Langkah 1: Prepare two file, 1 background and 1 object (for example, your photograph). Adapt the measurement of the photograph to the measurement stage in flash that was wanted by you. For the photograph of his object, don't forget to eliminate background him/was made transparent, so that this photograph could be placed well above background. To process the two photographs, you could use Adobe Photoshop. You could use 2 photographs along with:
The step 2: Be opened software flash, afterwards pressured Ctrl + R to import file background to stage. Arranged so that your image in accordance with the measurement stage, pressed Ctrl+J to arrange the measurement stage and the substitute for the speed animasi him became 29 fps. The substitute for the name of the layer to background. Aturdokmoving The step 3: Pressure Ctr + D (duplicate) to the picture background him, afterwards did group (the clique kanan– > Group) and pressed F8 (Convert to Symbol) – > chose Graphic – > gave the name bg to the box of the dialogue name.
The step 4: The substitute for the name of the layer to background, afterwards the clique frame 100 and 200 – > F6 (Insert Keyframe). The clique frame 100, afterwards, moved/shifted the picture background to left so as the position of the picture that on the side right, exact above stage. Timelinemoving The step 5: The right clique sembarang frame among frame 0 s.d 100 – > Create Motion Tween. Carry out the same step, to frame between 100 and 200. Until lrangkah this, in fact you could have tried him (Ctrl + Enter). The step 6: The right clique in the layer background – > gave the name of the layer by the name of the artist. The clique frame 1 – > Ctrl + R (Import) and put the picture of the object/the artist/your photograph. Use Free Transform Tool to arrange the object in order to appear interesting above background. Artisbg The step 7: Pressure Ctrl + Enter (Test Movie). Have fun and enjoy it. Popularity: 31% [? ]